3. Pointer mode controls and adjacent controls
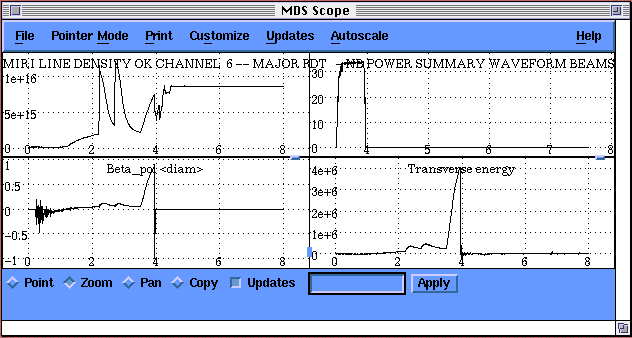
Figure 1. SCOPE display window.
MDSplus Scope Plotting Utility
The Scope program was designed to replace the hardware CAMAC based scopes which were used by the Alcator-C experiment. The purpose of those scopes (and of this program) is to provide a very fast display of data from the experiment.
This utility was written using the DECwindows(tm) programming environment and requires a DECwindows(tm) workstation to operate.
Scope works with MDSplus expressions using the Tree Data Interface Shared Library (TDISHR).
Document outline:
3. Pointer mode controls and adjacent controls
Figure 1. SCOPE display window.
To use Scope at PPPL
bring up an X-window and:
On Unix:% module load nstx % dwscope -def $NSTXUSR/util/scopes/wf.scope &dwscope defaults to the latest NTSX shot. Data for your scope may not have bee produced for that shot. Enter another in the box at the bottom, like 142000.
1 Panels
The Scope is divided up into stacks of panels where each panel contains one X and one Y Axis. (The possibility exists to draw more than one trace in each panel but is unimplemented at this time.)
Pressing the right mouse button (Button 3) within a panel will bring up a dialog box that allows the user to configure the panel. (See Figure 2.) This dialog controls the esthetics, the data, and the updating of the panel.
You may save or restore the settings using the Customize menu bar item.
1.1 Setup data source
Data may be specified (and calculated) with an MDSplus expression in the "Y Axis" text box when the selected item of a panel popup (right mouse button) is "Setup Data Source". (See Figure 3.)
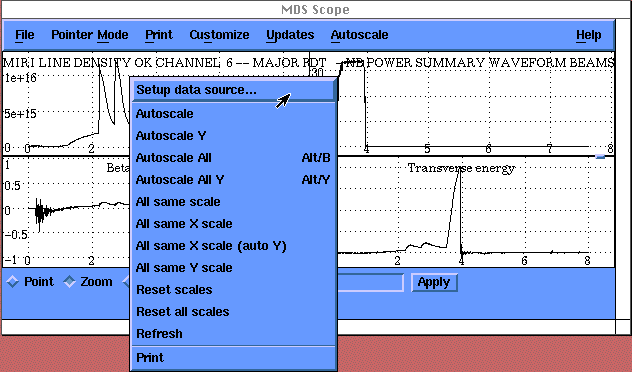
Figure 2. Panel drop-drop menu accessed via mouse-button 3.

Figure 3. Setup data source window.
1.2 Autoscale
Releasing the right mouse button on this item will restore this panel's plot to automatic scaling.
1.3 Customize
The number of grid lines and the presence of labels and other features may be set when the selected item of panel popup (right mouse button) is "Customize".
1.4 Print
This will output the panel in postscript format to either a file and/or printer. The Customize Print menu bar item is used to configure the Print operation. The Print menu bar item outputs all the panels on a single page, as displayed on the scre en.
1.5 Resizing_Panels
Holding the mouse on the sash in a panel boundary and pressing button 1 will let you adjust the position of that boundary.
You can also make all panels in a vertical group the same size by placing the mouse in a sash on one of the horizontal boundaries and then press button 1 while holding down the <SHIFT> key.
The result of selecting the Customize Window menu bar item is equally sized panels.
A horizontal boundary may be moved vertically.
A vertical boundary may be moved horizonally.
2 Mouse_Buttons
The mouse is used to interact with the Scope program. When in a panel:
2.1 Mouse button 1 (the left button)
In Crosshairs mode, each click displays the X and Y values of the cursor position.
In Zoom mode, each click will double the magnification. Dragging (moving the mouse while depressing the button) will make that region fill the box.
In Drag mode, dragging the cursor cause the data to move over the grid (not displayed).
2.2 Mouse button 2 (the middle button)
In Zoom mode, each click will halve the magnification.
In Drag mode, all data values are moved horizontally over the grid.
2.3 Mouse button 3 (the right button)
The Setup Data Source item brings up the configure dialog box, which changes any parameter of a panel.
The Autoscale item resets the Zoom and Pan to automatically scaled values.
The Print item prints the signal panel
The Cut item highlights the panel for copying the panel definition into another scope panel or DWPAD button.
The Paste item copies the currently selected scope panel or DWPAD button into this panel's definition.
On the panel boundary, mouse button 1 can drag the boundary to reshape the box. <SHIFT> mouse button 1 will make panels equally sized.
3 Pointer Mode controls and adjacent controls
The radio buttons at the bottom of the screen control the mode used when the mouse is clicked or dragged in the panels of the Scope.
3.1 Point
Point mode allows sampling data values or moving the crosshairs in all panels. The cursor becomes a plus sign when Point mode is chosen.
When mouse button 1 (left) is depressed in one of the panels of the Scope, crosshairs will appear in all of the panels. The crosshairs will track equal valued positions in each panel. When the mouse is released the current X and Y values will appear in the window below the mode radio buttons on the bottom of the Scope. Note, this value is linearly interpolated to the displayed data and is not the value at the cursor.
When mouse button 2 (middle) is clicked all of the panels will align their axes with the panel which was clicked on. This can be used to see what a trace did during an interesting section of another trace.
3.2 Zoom
The zoom mode cursor symbolizes a magnifying glass.Use mouse button 1 to click on the Zoom radio button.
The Scope program can zoom in and out on traces in two ways.
1 - Zoom around a specified point in the trace.
2 - Zoom to a box drawn over a trace.
Clicking mouse button 1 will zoom in on the point of the panel clicked on.
Clicking mouse button 2 will zoom out on the point of the panel clicked on.
Dragging mouse button 1 will draw a rubberband box to the current pointer position. When the mouse button is released the panel will zoom to make the box drawn the new limits of the data.
3.3 Pan
The Pan mode cursor is a cross with arrowheads. Use mouse button 1 to click on the Pan radio button.
In Pan mode the left button is used to grab onto a curve in a panel. The curve can then be dragged by moving the mouse without releasing the button. When the curve is in the desired position, release the button and the grids will be redrawn.
Using the middle button, all curves can be dragged simultaneously. Pick one of the curves, depress the right button on that curve and move the mouse to the left or right without releasing the button. All curves will move together. When the button is released all the grids will be redrawn. Only horizontal panning takes place in this mode.
3.4 Copy
The Copy cursor is two curved arrows. The copy action is to copy the currently digitized data into the X-Windows clipboard for transfer to another process.
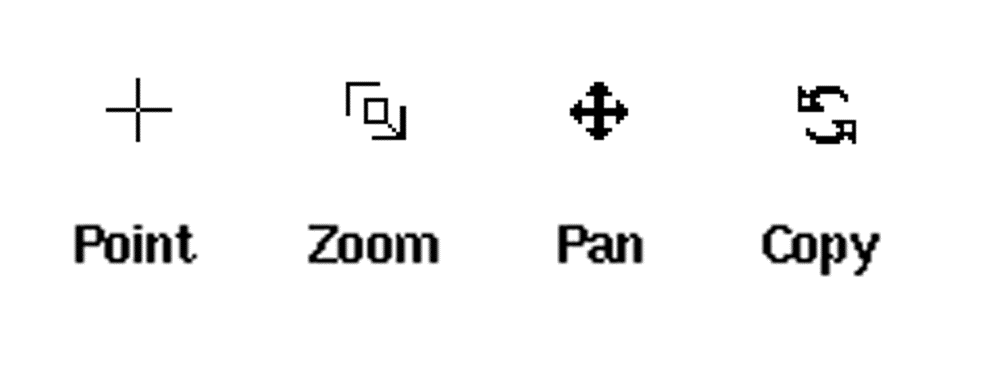
Figure 4. The Point (crosshair), Zoom, Pan and Copy cursors.
Also on the bottom of the window are two additional fields:
3.5 Updates check box
3.6 Shot Number text box
The text box to the right of the radio button provides a convenient way to change the shot displayed. Enter the desired shot number and either press Return or click on the Apply button.
4 Menus
Menu names are displayed in a standard menu bar located immediately below the title bar of the Scope display window. The Scope menu bar has four menu names. for a description of of the menu item s available from a particular menu, select its name from the list below.
4.1 Pointer_Mode menu
The pointer mode menu is used to set the actions taken when the mouse is operated in the panels of the graph. The actions may also be selected by icon.
Point menu item selects the Crosshairs mode.
Zoom menu item selects the Zoom mode.
Pan menu item selects the Pan mode.
Copy menu item selects the Copy mode.
4.2 Print menu
Print All will output the whole frame in postscript format to either a file and/or printer. The Customize Print menu bar item is used to configure the Print operation.
The Print entry on the right button popup menu will print a single panel rather the whole frame.
4.3 Customize
The customize menu sets up the overall configuration of the Scope.
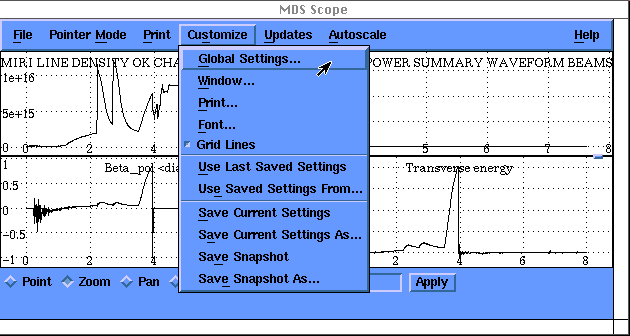
Figure 5. The Customize menu options.
Global... sets the default access.
This window provides an alternate location from which to change the shot number for all traces. To change the shot number for an individual trace, use the Setup Data Source window, shown earlier in the section on Panel options. Also use this window to select another Scope configuration file.
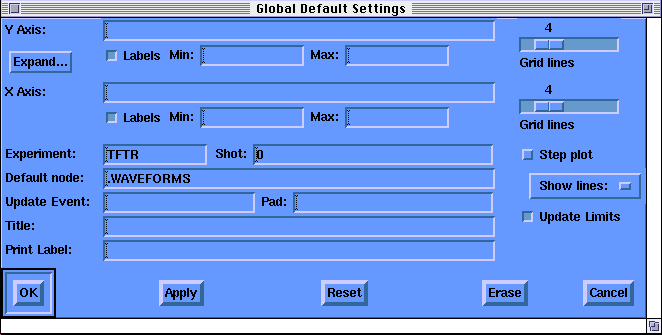
Figure 6. The Global Default Settings window.
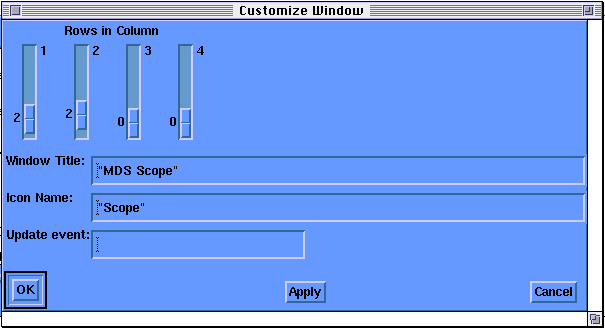
Window... sets the number of panels and the title.
Print... sets the print file and its options.
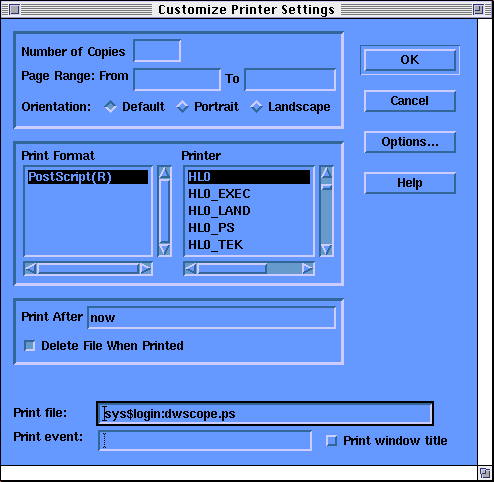
Figure 7. The Customize Printer Settings window.
Use Last Saved Settings sets all panels from file.
Use Saved Settings From... sets all panels.
Save Current Settings saves all panel setup info.
Save Current Settings As.. saves to a file.
4.3.1 Global
You may select default values for panel settings. When settings for each panel are referenced, the program checks to determine if "use default" has been selected for the setting. The use of defaults is selectable when setting up an individual pan el. If the DEFAULTS... push button is depressed when setting up a panel, a menu containing a toggle button for each panel setting is displayed. Use this menu to select items for which you want to use the default value. Changing an item on the pane l setup will automatically clear the "use default" setting of that item.
4.3.2 Window
You may change the displayed configuration of window or save or restore the configuration.
Rows sliders select 0 to 16 rows for each of the up to 4 columns, independently.
Window Title gives an overall name to the display.
Icon Name gives a name for the Window Manager box.
Event Name specify an MDSplus event on which to re-evaluate the title and icon.
4.3.3 Settings
Use Last Saved Settings menu item will restore a configuration from the current or default configuration file.
Use Saved Settings From... menu item will restore a configuration from the a file that you select and make it the current one.
Save Current Settings menu item will save the configuration to the current or default file.
Save Current Settings As... menu item will save the configuration to a file that you select.
4.4 Help menu
This menu item provides access to online help for the Scope program. The Glossary defines the terms used.
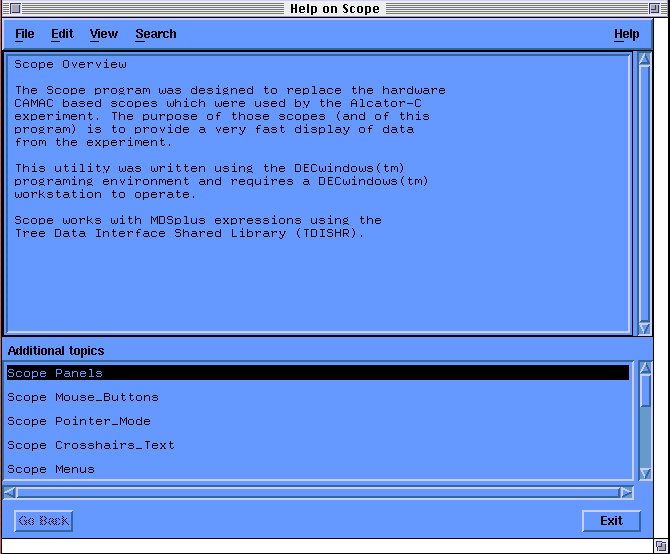
Figure 9. The Help window with 'Overview' selected.
Overview menu item presents an overview of the functionality of the Scope utility. To view this text either activate the Overview button on the help menu or choose Scope from the list of addi tional topics.
About menu item displays the copyright notice and version number for the Scope utility.
File explains the exit option.
Pointer Mode explains the pointer action.
Print explains the print all command.
Customize explains the general customization. Specific panels are altered with the right mouse button used in that panel.
Panels explains the options for each panel.
MDSplus takes you to the top-level of help on it.
TDISHR takes you to the top-level of help on the expression evaluator. You can also use the keyword search.
Command line users should give a ^Z and restart with
HELP @MDSplus Scope or
HELP @MDSplus TDISHR topics.
5 Glossary
crosshairs. horizontal and vertical lines that mark a point.
drag............ to move the data across the screen.
global......... a setting applied to all parts.
menu.......... a list of options.
mouse......... a windows pointing device.
pan.............. drag.
panel........... a single grid with a configuration.
zoom........... to make the plot appear to be closer or farther.
About
Software Version: MDSplus Version 1.0 13-Mar-1991
Help Version: MDSplus Version 1.0 13-Mar-1991
The information in these texts is subject to change without notice and should not be construed as a commitment by the MDSplus development team.
The software described in these texts is furnished under a license and may be used or copied only under the terms of such license.
No responsibility is assumed for the use or reliability of software on equipment that is not supplied by Digital Equipment Corporation or its affiliated companies.
Copyright ) 1989,1990,1991 by MIT,
Help ) 1990,1991 by MIT and LANL. All rights reserved